
")


If you’re on the hunt for a snack that’s both tasty and pretty wholesome, dehydrated apples might be just what you need. They pack a concentrated natural sweetness and are super handy for road trips, lunchboxes, or quick munching between meals. Drying apples at home is one of those projects that sounds intimidating, but it’s actually pretty straightforward. Here’s a super detailed look at why dehydrated apples are worth adding to your snacking game and how to get great results, plus some tips to help you kick things off if you’ve never made your own dried fruit before.
Why Dehydrated Apples Make a Healthy Snack
Dehydrated apples work great for anyone who wants that apple crunch without all the added sugar or preservatives found in many store-bought options. Here’s what makes them a better-for-you snack:
- Low in Fat: Apples are naturally super low in fat, and removing the water doesn’t add any. It’s just concentrated apple.
- Full of Fiber: Drying apples keeps all the fiber, which helps with feeling full and keeping things running smoothly in the digestion department.
- No Added Sugar: If you skip the sugar when making your own, the sweetness comes purely from the fruit.
- Lots of Vitamins: While some vitamin C is lost during dehydrating, you’ll still get decent amounts of other nutrients like potassium and B vitamins. Plus, there are no mysterious additives, so you can feel good about snacking.
If you’re watching calories, keep in mind that dehydrated apples pack more calories per gram than fresh ones just because they’re concentrated. Still, when eaten in moderation, they’re a really good alternative to commercial snacks loaded with sugar and fat.
Plus, giving apples a quick dry at home means you’re skipping a lot of the extra stuff you’d spot on most packaged foods, like preservatives or artificial flavors.
Getting Ready: Picking and Prepping Apples
The apples you choose will really shape the final taste and texture. Here’s how I like to get started:
- Pick What You Like to Eat: Sweet apples such as Fuji, Gala, or Honeycrisp work well because they hold their flavor after drying. Granny Smith apples offer a more tart snack, which is awesome for mixing in some variety.
- Wash and Core: Rinse the apples thoroughly. It’s up to you if you want to peel them. Leaving the peel on adds a bit of chew and boosts fiber, but makes the texture a bit tougher.
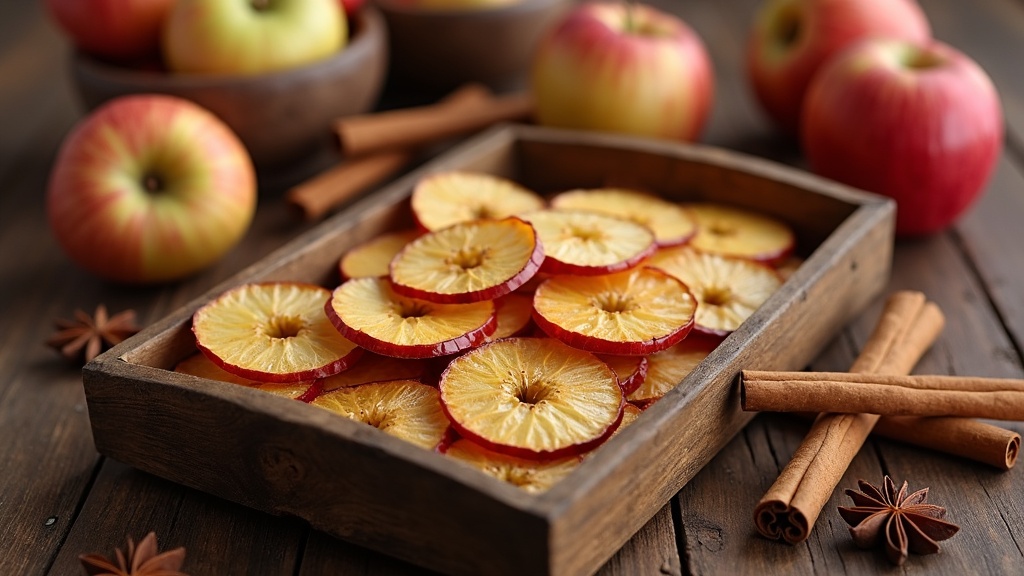
- Slice Evenly: Try to slice apples into pieces about 1/4 inch thick. Thin, even slices dry consistently, so you don’t end up with some floppy and some crunchy pieces in one batch.
When you slice the apples, think about presentation as well. Circular rings look great and are easy to pack, but wedges or strips work especially well for kid-friendly snacks.

Do You Have to Soak Apples Before Dehydrating?
Soaking apple slices before dehydrating isn’t required, but it helps if you want to keep them looking bright and avoid browning. Apples oxidize pretty quickly after slicing, turning a little brown, which doesn’t affect the taste but might not look as eye-catching. Soaking them in a mix of water and lemon juice (about 1 tablespoon lemon juice per cup of water) for 10 minutes works well. You can also add a pinch of salt to give a boost to flavor. Pat slices dry before dehydrating to avoid extra moisture in the dehydrator or oven.
How to Make Dried Apple Snacks (Step-by-Step)
You don’t need special equipment to make dried apples; a dehydrator smooths the way, but both the oven and air fryer also work well. Here’s a go-to approach:
- Prep Your Apples: Wash, core, peel (or not), and slice your apples. Soak in lemon water if you want to keep the color bright.
- Arrange on Trays: Lay out slices in a single layer with space between so air can flow. Overlapping leads to uneven drying and soggy patches.
- Dry Using a Dehydrator: Set your dehydrator to 135°F (57°C). Let apples dry for about 6 to 10 hours. Check them every now and then; thinner slices go faster.
- If Using an Oven: Preheat to the lowest setting (usually 150°F to 200°F). Prop the oven door open a crack to let out moisture and bake for 2 to 4 hours, flipping halfway through.
- Test for Doneness: Apples should feel dry, with no sticky spots. They’ll get a bit firmer as they cool. For chewy apples, take them out earlier. For crispiness, keep drying a bit longer.
- Let Cool andStore: Let the apples cool completely before transferring to an airtight container. This keeps away moisture and maintains freshness.
Sometimes, I like to sprinkle cinnamon or nutmeg over the slices before drying. It’s a simple upgrade if you’re a fan of spiced apple flavors. Or, try tossing a few strips in pumpkin spice for next-level cool autumn treats.
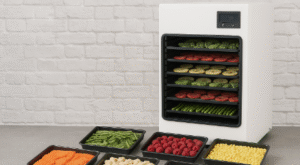
If you want to get a dehydrator – which is what I use Amazon has many to choose from – check them out here:
Food dehydrators from small to large
Should Dehydrated Apples Be Chewy or Crispy?
The final texture is all about personal preference and how long you dry the slices. Here’s the scoop:
- Chewy Slices: Most people like their dried apples to be a bit chewy. Chewy slices are soft, flexible, and easy to eat. These work well for snacking or using in homemade trail mixes.
- Crispy Slices (Apple Chips): Drying them longer turns the slices crisp and brittle. Apple chips are fun to eat on their own or to sprinkle on yogurt or oatmeal.
I usually aim for chewy snacks, but for storage that lasts even longer, the crispier the slice, the better the moisture has been removed. Just be sure to keep them airtight either way to keep things fresh.
Want to mix things up? Make a batch with both textures—you’ll figure out which is your favorite in no time.
Storing and Using Dried Apples
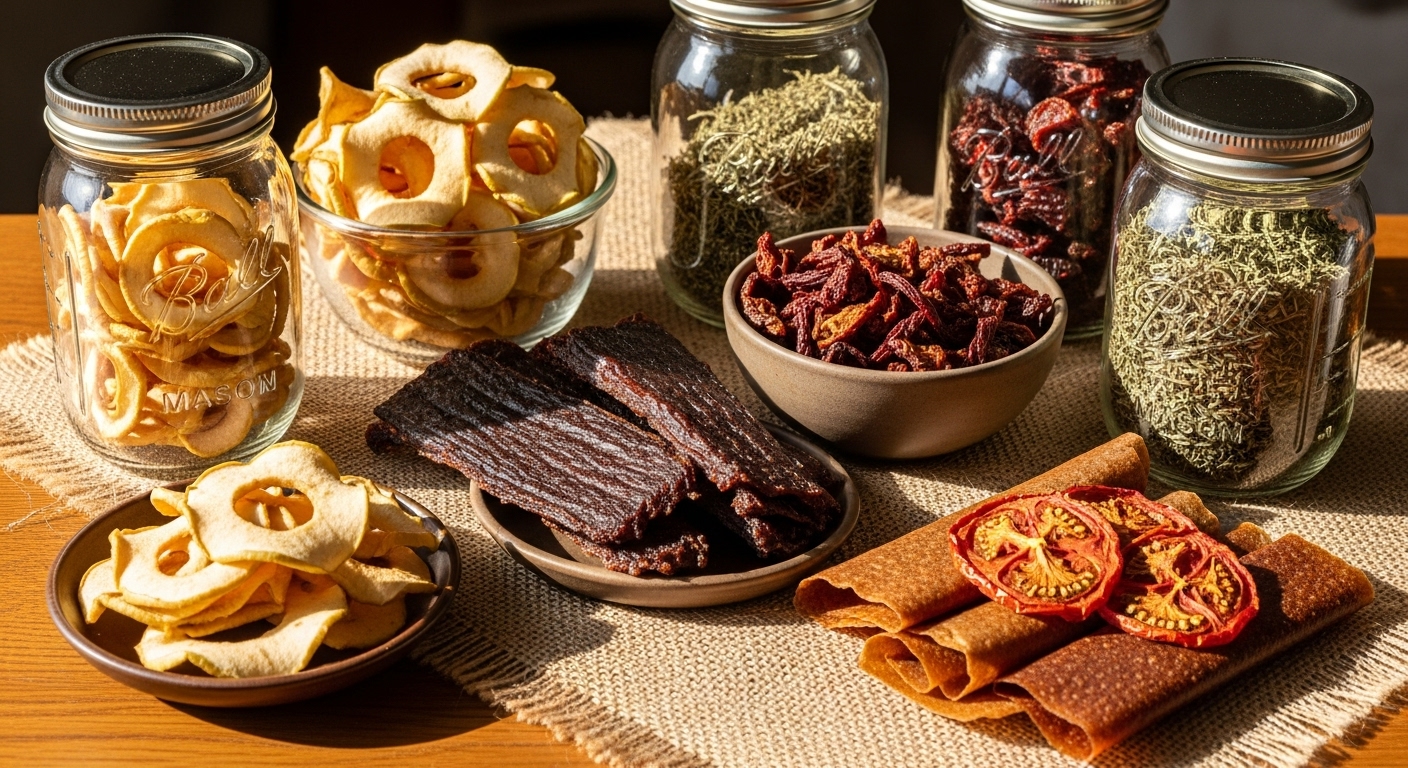
Dried apples keep for several months if you store them properly. Glass jars with tight lids, ziptop freezer bags, or vacuum-sealed pouches all work well. Add a food-safe desiccant packet for longer storage, or put them in the freezer if you won’t eat them soon.
I like tossing dried apples in granola, salads, and baked goods. You can also use them in homemade trail mixes, or just grab a handful as a midday energy boost. Soaking dried apples in hot water for a few minutes brings them back to life for recipes that call for fresh or cooked fruit.
If you love DIY gifts, a jar of home-dried apples tied with ribbon is the kind of thoughtful gesture that always gets a smile. They’re also great for putting in holiday baskets or including in homemade snack sampler packs.
Common Problems When Dehydrating Apples (And Simple Solutions)
Dehydrating apples is pretty straightforward, but things can go sideways if you’re new to it. Here are a few issues I’ve run into and some easy fixes:
- Slices Won’t Dry: If apples aren’t drying, check that slices aren’t overlapping and the temperature’s right. Thick slices or juicy varieties can take longer.
- Sticking to Trays: Use a mesh liner or parchment paper if slices stick. Just make sure there’s still enough airflow for drying.
- Uneven Drying: Rotate trays if your dehydrator or oven has hot spots. Flip slices partway through for better results. This tip also applies if you’re doing a big batch and want even consistency.
Be patient; sometimes the first batch is a learn-as-you-go experience, but you’ll get a feel for it quickly.
Bonus Tips for Upgrading Your Homemade Apple Snacks
A few quick extras can really take dried apples from good to awesome:
- Lightly dust with cinnamon sugar for a sweetener touch; just use sparingly to keep things healthy.
- Try a mix of apple types for fun flavor differences in one batch—all sweet, some tart, or a blend.
- Dip cooled slices in melted dark chocolate for an easy treat; let them set completely before storing.
- Use a mandoline slicer for even cuts and consistent results—less effort, better-looking snacks.
- Experiment with pear slices or mix in dried cranberries or raisins to your apple snack mix for a new twist.
You can also add a dash of cardamom, ginger, or allspice for special occasions or festive flavors.
Frequently Asked Questions About Dehydrating Apples
Here are a few common things people want to know when they’re getting started with dehydrating apples:
Are dehydrated apples a healthy snack?
Dehydrated apples really can be a good-for-you snack choice. They’re portable, naturally sweet, and keep you full thanks to their fiber content. Just remember—they’re calorie-dense, so small portions go a long way.
Do you have to soak apples before dehydrating?
No, you don’t have to soak apples, but soaking in lemon water keeps the slices from turning brown. If appearance matters to you, it’s an easy extra step.
Should dehydrated apples be chewy or crispy?
You can go either way—chewy or crispy—depending on how long you dry them and what you like. Chewy slices are soft and a bit flexible, while crispy slices snap like chips.
How do I make dried apple snacks at home?
All you need is fresh apples (washed and sliced), an oven or dehydrator, and some patience. Arrange slices in a single layer, dry them slowly on low heat, flip once, and store in an airtight container once cool.
Wrapping Up: Final Thoughts on Dehydrating Apples
Dehydrating apples at home is one of those satisfying kitchen projects where you know exactly what you’re getting. There are no mystery ingredients, no weird preservatives, just the kind of snack you don’t have to feel bad about reaching for. Mix up the flavors, stash a bag in the car, or set out a bowl for afternoon snacking. It’s tasty, simple, and a little bit old school in the best way possible. Plus, you’ll get a sense of pride biting into something you made yourself—now that’s next-level cool for any snacker.
© 2025, Teresa. All rights reserved.
Oh I found this post at just the right time! I recently moved into a new house with several fruit trees out back, so I’ve been learning all kinds of fun and interesting ways to use and preserve fruit. I’ve always been a huge fruit lover, but of course, it’s often so expensive! Especially over the winter here in Canada. I’ve done some juicing, freezing, made pies and jams, but haven’t thought about dehydrating.
Our little orchard doesn’t have apple trees, but we do have pears. Would this process also apply to pears? They’re ripening as we speak, I’m going to need some pear recipes soon!
Pears dehydrate beautifully! ???? They make a sweet, chewy snack and are great in baking too. Sounds like you’ll have plenty to experiment with—recipes coming soon! ????
This post really highlights how approachable dehydrating apples can be—I love that you broke it down into clear steps while also sharing little upgrades like sprinkling cinnamon or dipping slices in dark chocolate. The chewy vs. crispy comparison was especially helpful since that’s usually where I get stuck deciding which texture I’m aiming for.
I also appreciate the troubleshooting tips; knowing to rotate trays and keep slices evenly spaced feels like the kind of small detail that saves a batch from turning out uneven. And the reminder about storing them airtight is gold—I’ve definitely had snacks go soft too quickly before. The idea of gifting homemade apple chips in jars is such a thoughtful seasonal touch. This has me ready to try a mixed batch with tart Granny Smiths and sweet Honeycrisps!
So glad this inspired you! ????✨ Mixing tart Granny Smiths with sweet Honeycrisps sounds amazing — and I agree, a sprinkle of cinnamon or chocolate dip makes apple chips next-level. Can’t wait to hear how your batch turns out!
This is great information. I have an apple tree that is ripe and this information will help me to preserve some off the apples into apple crisps.
I’m so glad you found it helpful! How wonderful that your apple tree is ready to harvest—homemade apple crisps are such a tasty way to enjoy them longer. They make a great snack and store really well. Have fun preserving your apples! 🍎✨