
")


Homemade sauerkraut is one of those simple joys that only takes a few ingredients and a bit of patience. Fermenting cabbage in a mason jar brings together age old tradition and kitchen DIY, giving you a tasty, tangy food that supports your gut and adds a big flavor punch to loads of dishes. I’ll walk you through how to make sauerkraut at home in a mason jar, cover some common mistakes to avoid, and share why sauerkraut might really help your gut if you enjoy it regularly.
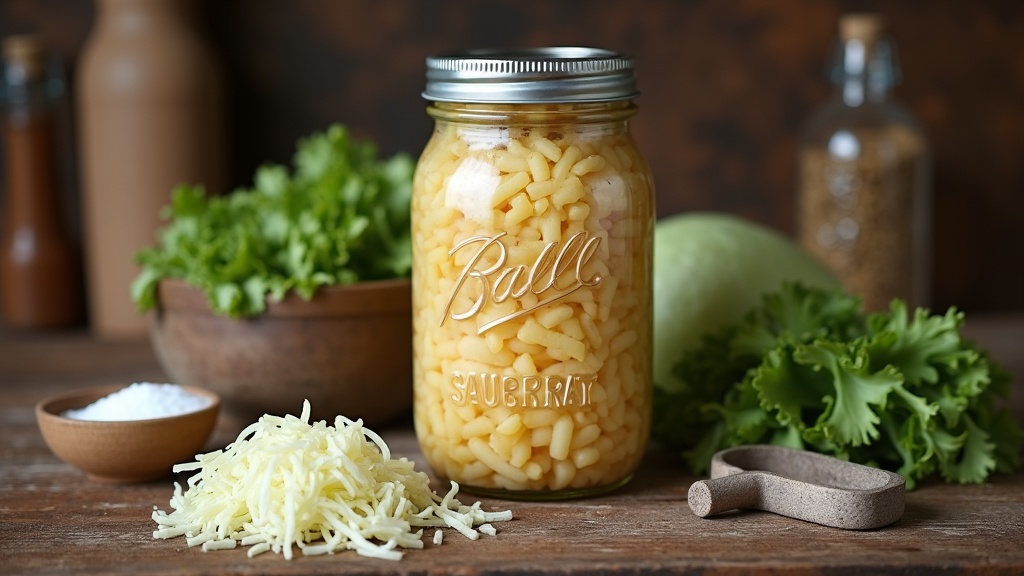
Why Make Sauerkraut in a Mason Jar?
Mason jars are really handy for small-batch fermentation, and you don’t need any fancy tools to get started. These jars keep air out and let the sauerkraut ferment naturally, so you get crunchy, sour cabbage with minimal hassle. Home fermentation is also a fun intro to food science. Watching cabbage transform just feels pretty cool, especially knowing you controlled the process yourself.
Besides being easy, jar fermenting lets you keep an eye on your batch without special equipment. You can even make it fit your taste (super sour or only mildly tangy) just by adjusting how long you let it ferment.
Step-by-Step Guide: How to Make Sauerkraut in a Jar
I love how simple the method is—and you likely have almost everything you need already. Here’s what works for me every time:
What You Need
- 1 medium head of green cabbage (about 2–2.5 lbs)
- 1–1.5 tablespoons of sea salt or kosher salt
- 1 wide-mouth quart mason jar (or a couple of pint jars)
- A larger mixing bowl
- A small jelly jar, fermentation weight, or even a zip topp bag (to help hold the cabbage under the brine)
Basic Steps
- Prep the cabbage: Peel off any tough outer leaves. Set one leaf aside for later. Cut the cabbage into quarters, remove the core, then shred the cabbage into thin strips.
- Salt and massage: Add the cabbage to your bowl and sprinkle the measured salt all over. Use your hands to toss and gently massage the cabbage for about 3-5 minutes. It’ll start off stiff but soon get soft and release a lot of juice. Keep going until there’s a decent puddle of liquid at the bottom.
- Pack the jar: Grab handfuls of cabbage and press them firmly into the mason jar. Aim for tight packing to prevent big air pockets. Pour in any juice that stayed behind in the bowl.
- Submerge and seal: Lay that clean, whole cabbage leaf over the top to help keep the shreds under the brine. Use a smaller jar, a fermentation weight, or a zip bag filled with a bit of water as a weight to hold the cabbage underneath. Seal the jar with its lid, loose fitting if possible or just open it every day to let gases escape.
- Ferment: Leave the jar at cool room temperature (around 65-75°F) out of direct sunlight. Check every day or so to ensure the cabbage stays submerged. If you see bubbles, that’s a good sign. It smells sour and looks fizzy after a few days.
- Taste and store: After 5 days, taste a bit. When it’s as sour and crunchy as you like (7 to 21 days is common), move the jar to the fridge. It’ll keep getting more flavorful but will slow down a lot in the cold.
How to Make Sauerkraut Simple
If you want super basic sauerkraut, you can skip any fancy spices or equipment. Just cabbage, salt, clean hands, and a jar. That’s really all you need. The “massage and pack” style is easy even for beginners. It’s hard to mess up if you go slow and make sure your hands and tools are clean.
Some folks like to add caraway seeds, juniper berries, or shredded carrots for extra flavor, but honestly, I find plain cabbage and salt makes a classic sauerkraut with bright, fresh notes. Try it plain at least once to see what you prefer!
Common Mistakes When Making or Cooking Sauerkraut
It’s normal to hit a few bumps along the way, but most issues are easy to sort out when you know what to watch for.
- Not using enough salt: Salt not only flavors the cabbage, but it’s also really important for keeping out bad bacteria. If you use too little, things might get slimy or moldy instead of tangy and crisp.
- Packing the jar too loosely: Loose packing means more air and makes it easier for cabbage to float above the brine, creating a spot for mold. Really tamp it down.
- Air exposure: If the cabbage floats above the liquid, it can develop an off taste or mold. Press it down daily if needed, and always keep it under the brine.
- Tightening the lid too much: Gases produced during fermentation need to escape. If you screw the lid on super tight, pressure can build up and mess with your batch, or even crack the jar. I prefer to keep lids fingertight and open daily (or use special fermentation lids designed to burp themselves).
- Overcooking sauerkraut: When using your finished sauerkraut in recipes, don’t cook it for long or at high heat, or the healthy probiotics get destroyed. To keep the good stuff, stir it in at the end or serve as a cold condiment.
Benefits of Sauerkraut for Your Gut
The probiotics in sauerkraut are super helpful for digestion. Fermentation fills it with live, friendly bacteria (mostly Lactobacillus species) that can support a happy gut. Eating sauerkraut regularly is linked with keeping your digestive system balanced because it boosts your gut bacteria diversity.
Is eating sauerkraut every day good for your gut? For most people, it can really help, especially if your diet is lacking in fermented foods. I’ve noticed less bloating and better digestion when I keep a spoonful or two in my meals, but everyone’s gut is different. If you’re new to fermented foods, though, start small. Sometimes, a sudden load of sauerkraut can make your gut a bit gurgly until it gets used to the boost in helpful microbes.
If you have any health conditions or concerns, especially those affecting your immune system, it’s always worth checking in with a medical professional before making big changes to your diet.
Extra Tips for Homemade Sauerkraut Success
- Weigh your cabbage and salt if you want ultimate precision; 2% salt by weight is a popular ratio for best results.
- If you see a white powdery coating (kahm yeast), it’s harmless. Just scoop it off, rinse the weight, and keep fermenting. Mold looks fuzzy or colorful and has a musty odor; discard and start again if this shows up.
- A mason jar funnel, a wooden spoon, or even your fist works great for packing cabbage tightly down into the jar.
- Label your jar with the date you started; you’d be surprised how easy it is to lose track!
- If your kitchen runs warm, fermentation goes faster. In cooler kitchens, be patient and give it extra time for tangy flavor.
Ways to Enjoy Your Homemade Sauerkraut
Fresh sauerkraut is so versatile. I use it as a topping for bratwurst or grilled cheese, mix it into salads, or pile it onto avocado toast. It also works well stirred into potato salad or tucked into tacos. Just keep in mind that raw is best for preserving the good bacteria, though adding a bit to a warm dish at serving time is fine.
You can even get creative. Try pairing it with roasted veggies or mixing it into simple grain bowls. The tang brightens up so many foods!
Frequently Asked Questions
Getting started with homemade sauerkraut brings up lots of questions, so here are a few you might have too:
Question: Do I need special fermenting lids or weights?
Answer: Regular mason jar lids and DIY weights (like a clean shot glass or a ziplock bag with water) work well for small batches. Special fermenting lids are nice, but definitely not required for success.
Question: What if I see bubbles or it smells funky?
Answer: Bubbles mean fermentation is happening. Sauerkraut has a sour, strong odor. As long as there’s no fuzzy or green mold, your batch is probably good. Trust your senses; clean, tangy, and slightly briny are all normal.
Question: How long does homemade sauerkraut last in the fridge?
Answer: Usually at least 2-3 months, and sometimes longer. Always use clean utensils to scoop some out, and if it develops a strange color or odor, toss it and make a new batch.
Question: Can I double or halve the recipe?
Answer: Absolutely. You can make as much or as little as you want, just keep the salt/cabbage ratio steady. You’ll need an extra large jar or fermenting crock for big batches.
For those seeking a real adventure in flavor, try switching things up by using red cabbage for an extra pop of color and a slightly different taste. You might also blend in garlic, ginger, or even thin slivers of hot pepper for next level cool, spicy kraut that stands out in any meal. Homemade sauerkraut is your blank canvas, so have fun experimenting and see what you stumble upon in your own kitchen.
Wrapping Up
Making sauerkraut in a mason jar is practical, tasty, and requires almost zero special gear. By following these basic steps and paying attention to a few common mistakes, you’re set for tasty, gut friendly kraut every time. It’s a no fuss way to add both zing and healthy microbes to your meals, and the satisfaction of making it yourself is pretty hard to beat. Give it a try, dig into new combinations, and don’t be afraid to share your homemade creations—with so many ways to tweak and enjoy sauerkraut, you’ll soon have your own favorite version to show off at the table.
© 2025, Teresa. All rights reserved.
Another great post here! I love sauerkraut and would love to make it. Another post bookmarked 🙂
Great idea to add other veggies. I’m definitely doing that, too.
Teri
I really enjoyed this post—it makes sauerkraut feel so approachable, even for someone who hasn’t tried fermenting before. The step-by-step breakdown with just cabbage, salt, and a jar shows how simple the process can be, and I love that you included both common pitfalls and easy fixes. The reminder about not over-tightening the lid and letting gases escape is one of those little details that could save beginners from a messy surprise.
The gut health benefits you touched on are also super motivating. I’ve been trying to add more fermented foods into my diet, and hearing how you work sauerkraut into everyday meals (like tacos and avocado toast) gave me fresh ideas beyond the classic bratwurst topping. I’m especially tempted to try a red cabbage or spicy variation for extra color and flavor. Thanks for sharing such a practical guide—it makes me want to start a jar this week!
I’m so glad you found it helpful! Red cabbage and spicy variations are both delicious—I think you’ll love how they turn out. Starting a jar this week sounds like the perfect plan! I’ve got two on the go right now.