
")


Learning water bath canning is one of those skills where you really get both practical benefits and a little confidence boost in the kitchen. By preserving your own food at home, you can enjoy homegrown jams, pickles, and salsas year-round, even when the farmer’s market is closed for the season. With so many canning recipes and tools out there, it can feel like a lot to figure out at first, but I’ll walk you through the essential steps so you’ll be set up to can safely and confidently from your own kitchen.
What Is Water Bath Canning?
Water bath canning is a simple and popular method for preserving high acid foods like fruits, tomatoes, jams, jellies, and pickles. The process uses boiling water (212°F or 100°C) to kill off molds, yeasts, and bacteria that can spoil your canned goods. By heating jars of food in a big pot of boiling water, you also vacuum seal the lids, keeping things shelf-stable for months to come.
This method is a good pick for anyone new to food preservation because it doesn’t require any fancy pressure canning equipment, and you’ll only need some basic supplies and common sense safety steps.
Essential Supplies for Water Bath Canning
There are a few must-have items you’ll want before getting started. A lot of these can be found at big box stores, local hardware shops, or even thrift stores. Here’s what’s on my canning supply checklist:
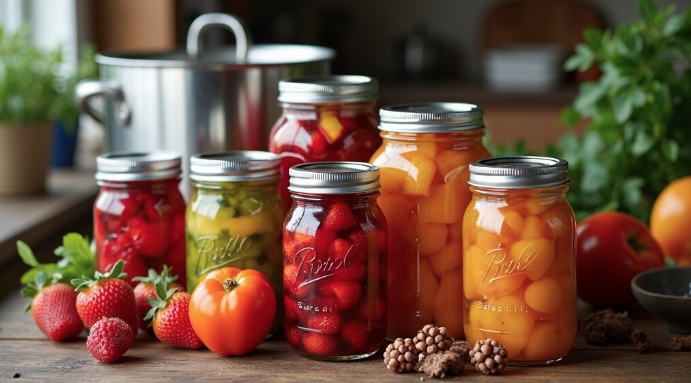
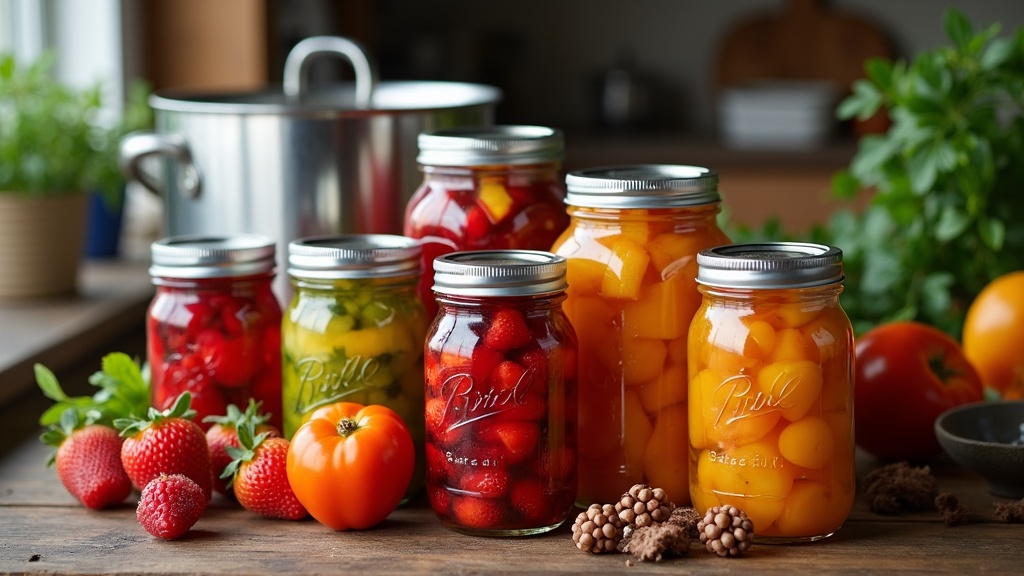
- Canning Jars and Lids: Mason jars with new lids are the main containers for your preserves. Make sure your jars are free of chips or cracks.
- Large Stockpot or Water Bath Canner: The pot needs to be deep enough so that water covers your jars by at least one inch.
- Jar Rack: This keeps jars off the bottom of the pot, stopping direct contact with high heat and making removal easier.
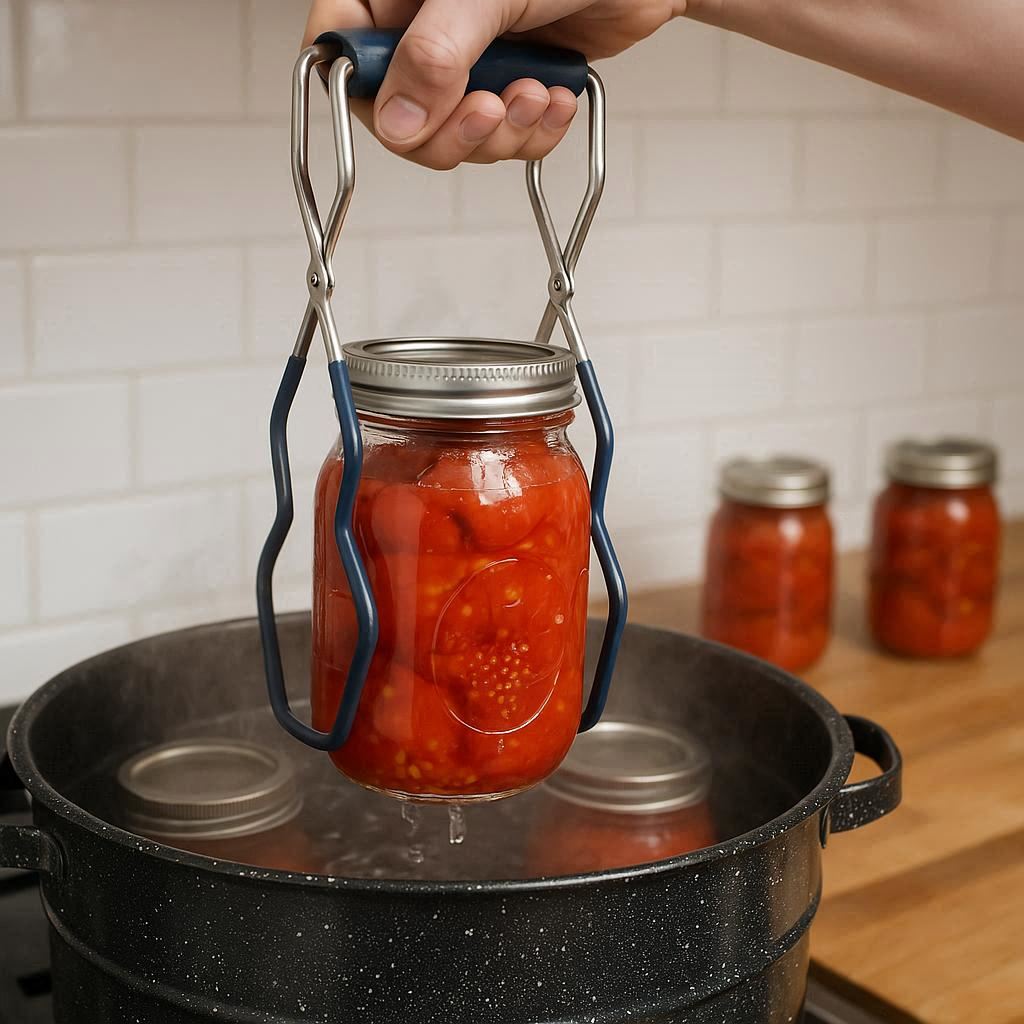
- Jar Lifter: Like big tongs, this tool makes it much safer to grab hot jars from boiling water.
- Funnel: Wide-mouth funnels help you pour your hot food into jars neatly and with way less mess.
- Ladle: Handy for scooping jam or salsa into jars.
- Bubble Remover/Headspace Tool: This helps you check the proper air gap at the top of each jar and remove air bubbles that can affect sealing.
- Clean Towels: Good for wiping jar rims and handling hot jars safely.
Step-By-Step Guide to Water Bath Canning
Once you have your supplies on hand, you’re ready to get started. Here’s how the process usually goes in my kitchen:
- Prep Your Food: Wash, chop, peel, or cook your jam, pickles, or whatever you’re preserving based on your recipe. Using high acid recipes recommended for canning is super important for food safety.
- Sterilize the Jars: Wash your jars thoroughly and place them in the canner filled with simmering water (not a hard boil) to heat up and sterilize. Lids should be washed and set aside; just warm them with hot tap water if the manufacturer suggests.
- Prepare the Water Bath: Fill your canner or stockpot about halfway with water and bring it to a low simmer while you get your food and jars ready.
- Fill the Jars: Working one jar at a time, take a hot jar out of the canner and set it on a folded towel. Use a funnel and ladle to fill the jar, leaving the recommended headspace (usually ¼ to ½ inch, depending on your recipe). Remove any bubbles with a clean nonmetallic tool, and adjust the headspace if needed.
- Wipe Rims and Apply Lids: Wipe the jar rim with a damp cloth to ensure a good seal. Place the flat lid on top, then screw the band on just until it’s fingertip tight, not cranked on super tight.
- Process the Jars: Set the filled jars on the rack in the canner. Lower the rack so jars are submerged under at least one inch of boiling water. Cover the pot and return to a vigorous boil, then start your processing time from when the water is at a rolling boil.
- Cool and Check the Seals: When the timer ends, turn off the heat and let jars sit for around 5 minutes. Use the jar lifter to transfer them to a towel on your counter, spacing them out. Don’t tilt or retighten the lids. Let them cool undisturbed for 12-24 hours.
- Check and Store: After the jars have cooled, press the center of each lid. A sealed lid won’t bounce up and down. Remove bands for longer storage and wipe off the jars before storing in a cool, dark spot.
Common Mistakes (and How to Avoid Them)
A lot of canning mistakes are easy to avoid if you know what to watch for. Here’s what I look out for each time:
- Using Old or Damaged Jars: Chips or cracks can compromise safety and sealing, so always inspect jars ahead of time.
- Skipping the Headspace: Leaving too little air or too much can mess with the seal or lead to spoilage. Use the proper measurement tool for accuracy.
- Overtightening Lids: Bands should be tightened just with your fingertips. Too much pressure can prevent gases from escaping and keep jars from sealing.
- Not Following Process Times: Adjust time for your altitude if needed (higher elevation needs a little extra time). Don’t guess; use tested recipes and stick with official recommendations from trusted sources like the National Center for Home Food Preservation.
Storing and Enjoying Your Home-Canned Foods
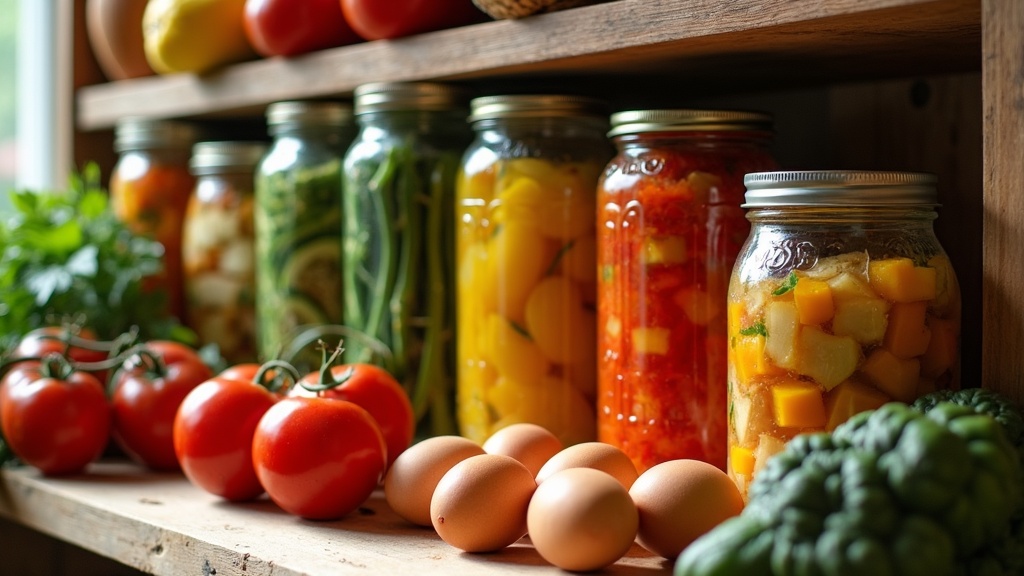
Once your jars are sealed and labeled (I usually jot down the date and contents on the lid or with a sticker), they’re pantry-ready! Store them in a place that is cool, dry, and out of direct sunlight. Properly sealed jars should last for a year or more, though flavors are usually best within that first year.
I love putting up jars of tomato sauce and berry jams in late summer, since these make perfect gifts and easy weeknight dinners later on. Always check the lid and smell the contents before opening. When in doubt, toss anything that looks off or has lost its seal.
Tips and Tricks for More Successful Canning
Some tips really do make home canning a lot smoother:
- Preheat Your Jars: Keeping jars hot before adding food helps prevent cracks and also makes filling easier.
- Stay Organized: Laying everything out on clean towels before you start helps you keep track and prevent confusion when jars are hot and time is tight.
- Double-Check Recipes: Always use recipes designed for water bath canning; old or untested recipes may not be safe for shelf storage.
- Don’t Reuse Lids: New lids give you the best chances for a solid seal each time. Rings (bands) can be reused as long as they’re rust free.
- Know When to Use a Pressure Canner: Low acid vegetables, meats, and beans need a pressure canner for safety. Save those projects until you’re comfortable with the basics.
Real World Uses for Home Canning
Canning at home isn’t just some old school tradition; it’s really handy for making the most of seasonal produce, saving money, and avoiding food waste. If you have fruit trees, a big garden, or just find good deals on bulk produce, canning gives you a way to keep that flavor going long after the harvest.
- Making Unique Gifts: Jars of homemade jam or pickles are always a hit for birthdays or holidays.
- Building a Pantry: With a stash of sauces and fruit spreads, you can put together quick meals or snacks even when your fridge looks empty.
- Preserving Special Diet Items: Control the sugar, salt, and spices to suit your family’s needs or allergies.
For example, I like to put up extra peach halves from summer farmers’ market hauls, and they’ve come in handy for desserts or breakfast toppings long after peach season wraps up. Plus, having a shelf full of home canned goods means you’re ready in a pinch for surprise guests or potlucks, as a jar of something sweet or tangy can quickly become a table standout.
Another big bonus to canning your own food is knowing exactly what goes into your preserves. If you want to limit additives or cut back on sugar, homecanning lets you pick recipes that match your preferences, whether you’re into spicy salsa or classic strawberry jam. Over time, you build up a pantry that really reflects your taste—and the effort is always worth it during the winter months, when you can pull out a jar of summer fruit when fresh options are slim.
Frequently Asked Questions
New canners usually have some smart questions, so here’s a little Q&A from what I hear most often:
Q: Can I use a regular kitchen pot instead of a canner?
A: Yes, any pot with a tight-fitting lid and enough depth for an inch of water above your jars works. Just don’t forget a rack or folded towel under your jars!
Q: My jar didn’t seal after cooling. What can I do?
A: Refrigerate and use within a few days, or try reprocessing with a new lid right away.
Q: Is it okay to add extra spices or reduce sugar in recipes?
A: Stick to tested recipe ratios for acid, sugar, or salt to keep things safe. Feel free to swap out spices or herbs to tune the flavor to your taste.
Start Your Canning Adventure
With a few tools and a good recipe, water bath canning becomes a kitchen tradition that saves money, reduces food waste, and lets you share delicious preserves with friends and family year after year. Grabbing those mason jars and tackling a batch of your own preserves can really show just how simple and rewarding home food preservation can be. Once you get the basics down, canning is a great way to build skills and keep your pantry full.
© 2025, Teresa. All rights reserved.
This is such a thorough and beginner-friendly guide—you really broke down the steps in a way that makes canning feel approachable instead of intimidating. I especially like how you emphasized both safety (headspace, sterilizing jars, following tested recipes) and the little practical tricks (like preheating jars and staying organized) that make the process smoother.
I also appreciated how you connected canning to real-life benefits—saving money, reducing waste, making gifts, and keeping seasonal flavors alive all year. It turns the process into more than just “kitchen work” and really shows the lifestyle value.
Out of curiosity, do you personally find yourself canning more for practical pantry staples (like tomato sauce, pickles, etc.) or for the fun seasonal treats (like jams and fruit preserves)?
Thank you so much—I’m glad the guide felt approachable! I do a mix of both: staples like tomato sauce and pickles for everyday use, and then I love making seasonal treats like jams when the fruit is fresh. Seeing them all lined up on the shelf really makes the effort worthwhile!
Water bath canning offers such a practical and traditional way to preserve fruits, jams, and pickles while maintaining much of their natural flavor. The process feels both methodical and creative, where attention to detail with sterilization, headspace, and timing can make all the difference in achieving safe, shelf-stable results. Many beginners find that once they gain confidence with the rhythm of preparing jars, boiling, and sealing, it becomes almost second nature. What makes this method especially appealing is how it connects people to seasonal eating, letting summer harvests or fall produce be enjoyed throughout the year. It is both a preservation technique and a way of extending the satisfaction of gardening into the colder months.
Absolutely! You captured it so well — once you get into the rhythm, canning really does become second nature. And there’s nothing better than opening a jar in winter and tasting the summer harvest all over again. ????????????